

Overview
The Announcements module in the HRMS Portal provides a central place for HR administrators to publish and manage company announcements. It allows important information, such as policy reminders, operational changes, and organization-wide notices, to be shared with the right audience for a defined period, with a priority level and an optional email notification.
The Announcements module contains the following areasthat work together to support internal communication:
- Announcements Listing: Used to view every announcement in the system, alongwith its country, status, priority, and start and end dates.
- Add Announcement: Used to create a new announcement and define its audience, schedule, priority, and notification settings.
- Announcement Details: Used to view the full content, key dates, target audience, and notification information of an announcement.
- Edit and Delete: Used to update an existing announcement or remove it from the system.
This guide covers:
- How to access the Announcements module from the left sidebar.
- How to view the Announcements listing page and its page controls.
- How to create a new announcement using the Add Announcement form.
- How to view the details of an announcement.
- How to edit an existing announcement.
- How to delete an announcement.
📜 Note: Access to the Announcements module and its actions is controlled by role permissions. Users must have Announcements module access to create, edit, or delete announcements.
Prerequisites
Before working with the Announcements module, ensure the following are in place:
- The user must be logged in with a role that has access to the Announcements module.
- If an announcement is to be targeted at a specific country or department, those countries and departments must already be configured in the system.
Section 1: Accessing the Announcements Module
After logging in to the HRMS Portal, follow the steps below to access the Announcements module.
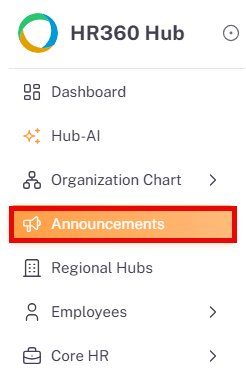
- From the left sidebar, click on Announcements. It is listed as a single menu item, between Organization Chart and Regional Hubs, and does not have a sub-menu.
- The menu item is highlighted when active, and the Announcements listing page opens.
Section 2: Announcements Listing Page
The Announcements listing page displays every announcement created in the system. It is the default page that opens when the Announcements menu item is clicked, and it is the starting point for adding, viewing, editing, and deleting announcements.

2.1. Listing Table Columns
Column | Description | Sortable |
Title | The title of the announcement, displayed as an orange link. | Yes |
Country | The country the announcement is targeted at, or a dash if no country has been set. | Yes |
Status | The current status of the announcement, shown as a colored badge, e.g. Active. | Yes |
Priority | The priority assigned to the announcement, shown as a colored badge, e.g. High. | Yes |
Start Date | The date the announcement becomes active. | Yes |
End Date | The date the announcement expires. | Yes |
Actions | Eye icon: Opens the announcement details. Pencil icon: Opens the announcement for editing. Trash icon: Deletes the announcement. | No |
2.2. Page Controls
- Items per page selector: Controls the number of records displayed per page(default: 10).
- Search icon: Filter announcements by title or other fields.
- Refresh icon: Reload the listing to reflect the latest changes.
- + Add Announcement button: Opens the Add Announcement form to create a new announcement.
- Pagination controls: Navigate through pages using the page buttons at the bottom of the listing. The total number of records is shown at the bottom left.
Section 3: Creating an Announcement
To create a new announcement, click the + Add Announcement button on the Announcements listing page. The Add Announcement form opens, where you define the announcement’s content, schedule, audience, and notification settings.
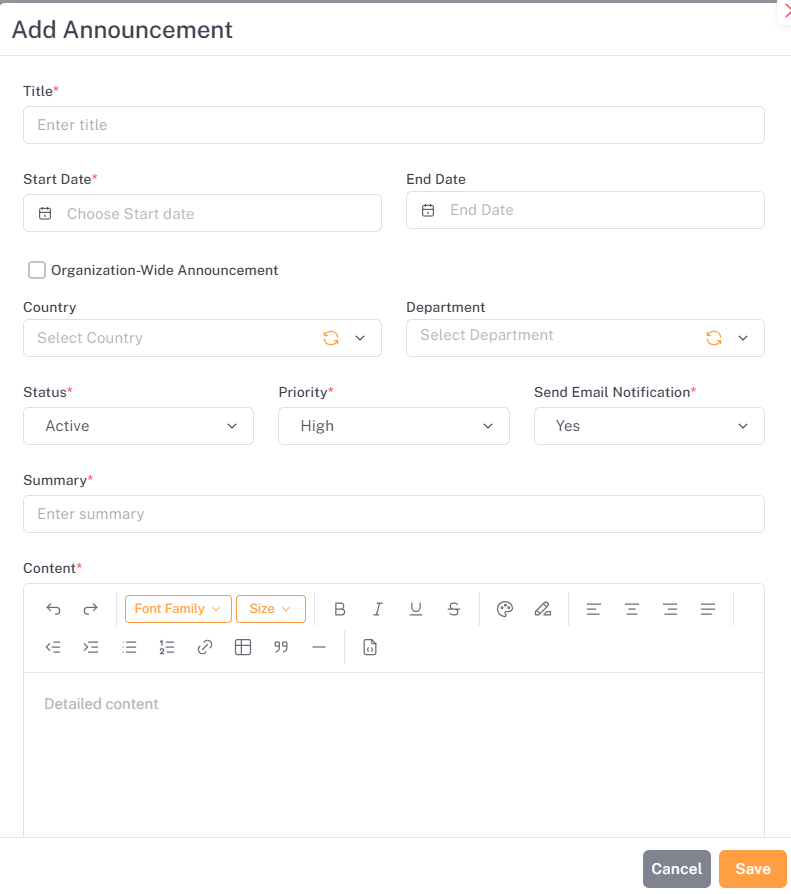
Field | Required | Description |
Title | Yes | Enter the title of the announcement. |
Start Date | Yes | Select the date the announcement becomes active. |
End Date | No | Select the date the announcement expires. |
Organization-Wide Announcement | No | Select this checkbox to make the announcement apply to the whole organization. When selected, the Country and Department fields are disabled. |
Country | No | Select the country the announcement is targeted at. |
Department | No | Select the department the announcement is targeted at. |
Status | Yes | Select the status of the announcement, e.g. Active. The default value is Active. |
Priority | Yes | Select the priority of the announcement, e.g. High. The default value is High. |
Send Email Notification | Yes | Select Yes to send an email notification for the announcement, or No to publish it without one. The default value is Yes. |
Summary | Yes | Enter a short summary of the announcement. |
Content | Yes | Enter the detailed content of the announcement using the rich-text editor. |
The rich-text editor in the Content field includes the following formatting options: undo and redo, font family and size, bold, italic, underline, and strikethrough, text and highlight color, text alignment, indentation, bulleted and numbered lists, links, tables, quotes, and horizontal lines.
To create the announcement:
- Click + Add Announcement on the listing page.
- Fill in the required fields, which are marked with a red asterisk (*).
- Select Organization-Wide Announcement to reach the whole organization, or choose a Country and Department to target a specific audience.
- Click Save to create the announcement, or click Cancel to close the form without saving.
💡 Tip: Select Organization-Wide Announcement for notices that apply to every employee. Use the Country and Department fields only when the announcement is relevant to a specific group.
Section 4: Viewing Announcement Details
To view an announcement in full, click the Eye icon in the Actions column of the Announcements listing page. The announcement details page opens, showing the content of the announcement alongside its schedule, audience, and notification information.
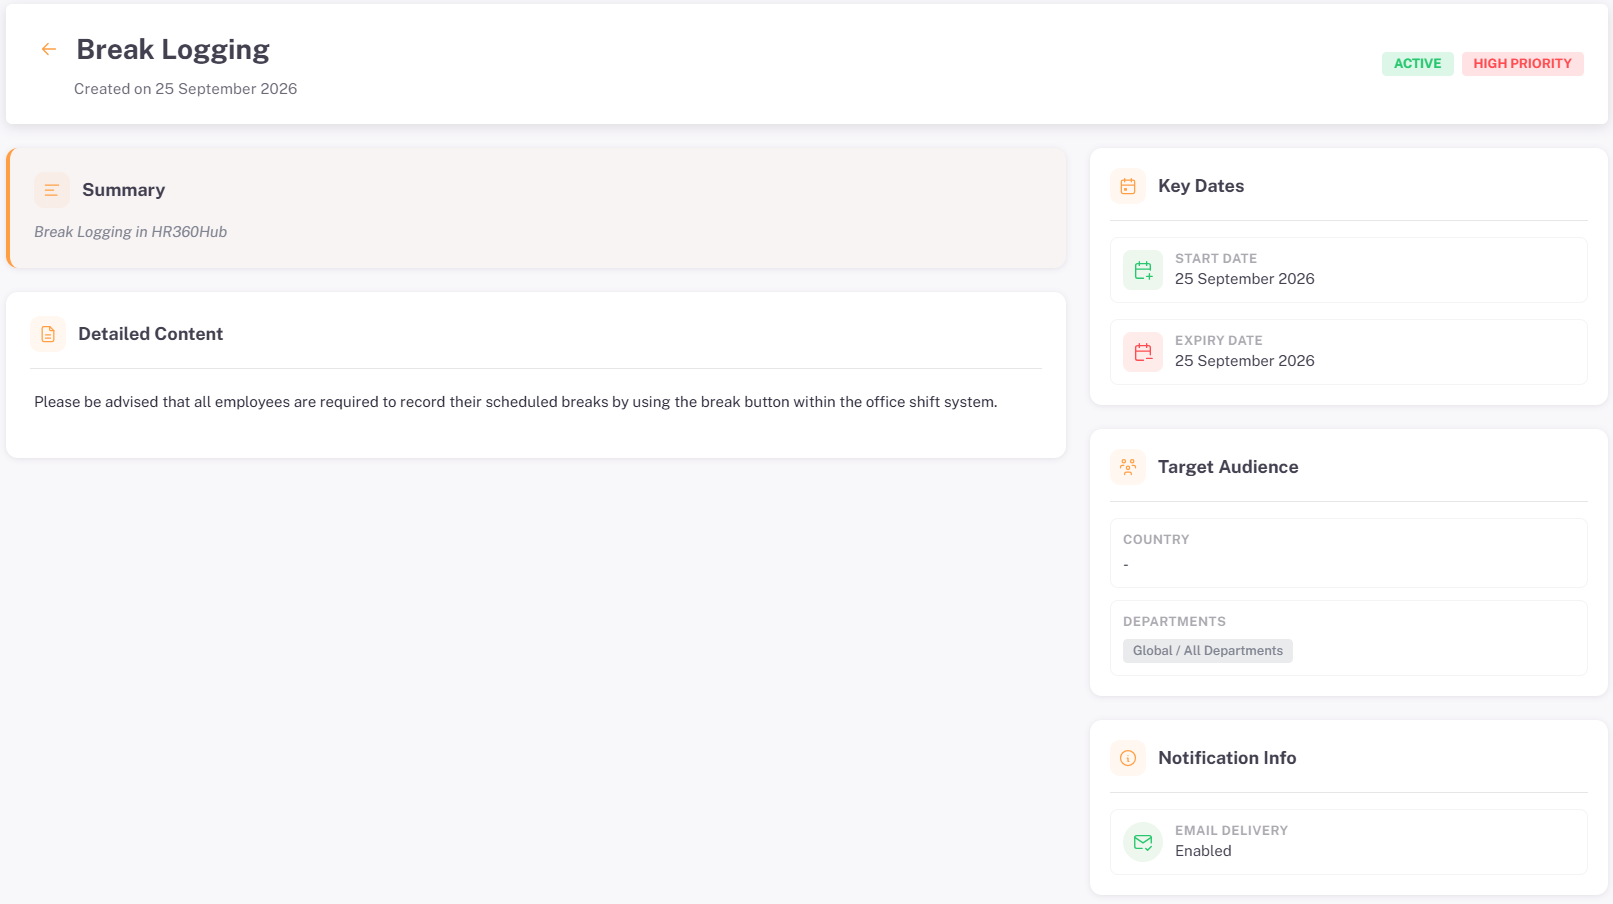
The page header displays the announcement title, the date it was created, and badges showing its current status (e.g. Active) and priority (e.g. High Priority). Click the back arrow next to the title to return to the Announcements listing.
Panel | Description |
Summary | The short summary entered when the announcement was created. |
Detailed Content | The full content of the announcement, as entered in the rich-text editor. |
Key Dates | The Start Date, on which the announcement becomes active, and the Expiry Date, on which it expires. |
Target Audience | The Country and Departments the announcement is targeted at. Organization-wide announcements show Global / All Departments under Departments. |
Notification Info | Whether email delivery is enabled for the announcement, e.g. Enabled. |
Section 5: Editing an Announcement
To update an existing announcement, click the Pencil icon in the Actions column of the Announcements listing page. The Edit Announcement form opens with the current values of the announcement already filled in.
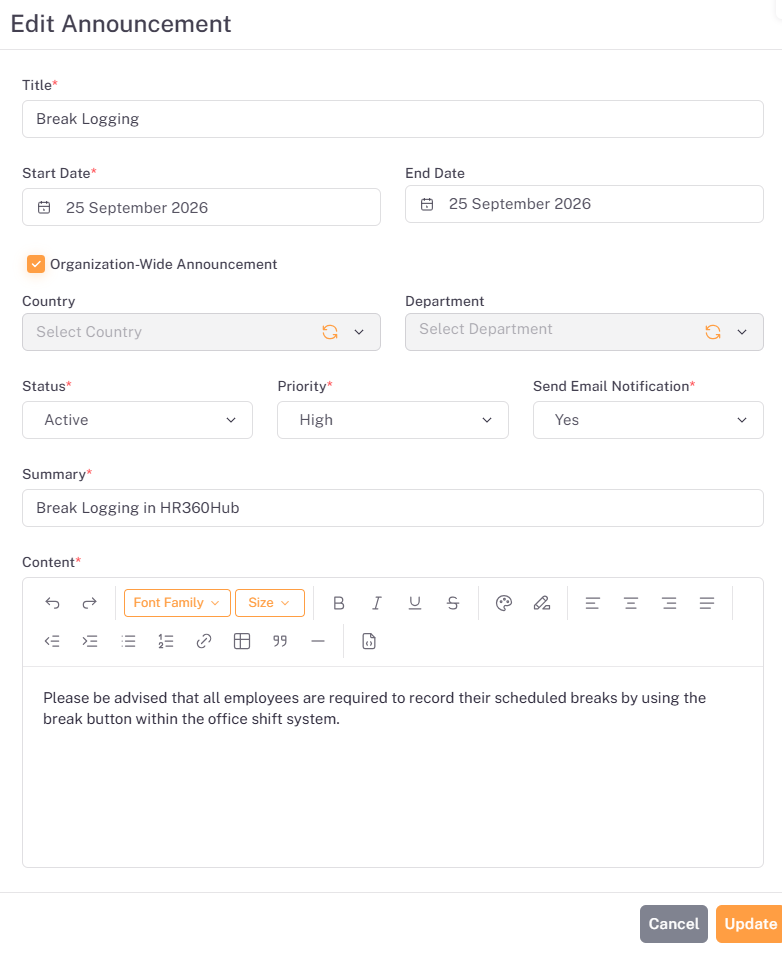
The Edit Announcement form contains the same fields as the Add Announcement form described in Section 3. Update any of the values as required, then follow the steps below.
- Click the Pencil icon for the announcement you want to update.
- Change the required fields. When Organization-Wide Announcement is selected, as shown above, the Country and Department fields are greyed out and cannot be changed.
- Click Update to save the changes, or click Cancel to close the form without saving.
📜 Note: Clear the Organization-Wide Announcement checkbox if you need to target the announcement at a specific Country or Department.
Section 6: Deleting an Announcement
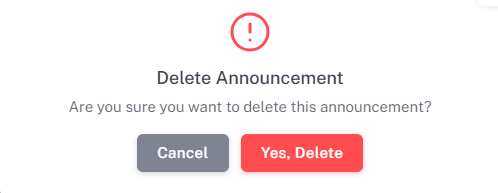
To remove an announcement, click the Trash icon in the Actions column of the Announcements listing page. A confirmation dialog appears before the announcement is deleted.
- Click the Trash icon for the announcement you want to delete.
- In the Delete Announcement dialog, review the message “Are you sure you want to delete this announcement?”.
- Click Yes, Delete to confirm, or click Cancel to close the dialog without deleting the announcement.
Summary
The following table provides a complete step-by-step summary of all key workflows in the Announcements module:
# | Action / Step | Result |
1 | Access Announcements: Log in → Announcements in left sidebar. | Announcements listing page opens showing all announcements with title, country, status, priority, start date, and end date. |
2 | Create an Announcement: Click + Add Announcement → Enter title, dates, audience, status, priority, email notification, summary, and content → Click Save. | New announcement is created and added to the Announcements listing. |
3 | Target an Audience: In the Add Announcement form, select Organization-Wide Announcement, or choose a Country and Department. | Announcement applies to the whole organisation, or to the selected country and department only. |
4 | View Announcement Details: Click the Eye icon for any announcement. | Details page opens showing summary, detailed content, key dates, target audience, and notification information. |
5 | Edit an Announcement: Click the Pencil icon → Update the required fields → Click Update. | Announcement is updated with the new values. |
6 | Delete an Announcement: Click the Trash icon → Click Yes, Delete in the confirmation dialog. | Announcement is deleted from the system. |