

Overview
The Organization Settings area of the HRMS Portal lets administrators configure how the portal looks, behaves, and communicates for the whole organization. It sits under Portal Settings and groups together the global defaults, reporting hierarchy, branding assets, theme, outgoing email, and AI assistant options that apply to every user.
Organization Settings contains the following areas thatwork together to configure the portal:
- General Settings: Sets the organization-wide time zone, language, currency, and date format.
- Organization Chart: Designates the company CEO as the top-level (root)user of the reporting hierarchy and shows a history of root-user changes.
- Branding: Controls the company name, slogan, footer text, header logo, and favicon.
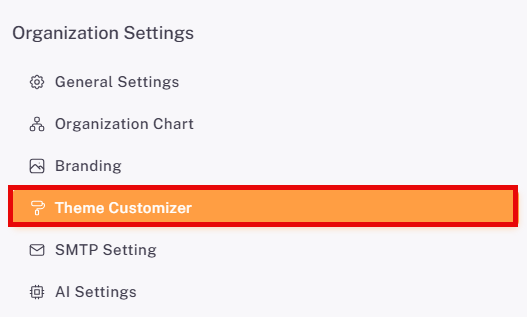
- Theme Customizer: Controls the primary color, theme mode, skin, and semi-dark menu.
- SMTP Setting: Manages the outgoing mail servers the portal uses to send emails.
- AI Settings: Customizes the name and description of the AIAssistant to match company branding.
This guide covers:
- How to access OrganizationSettings from the left sidebar.
- How to set the organization's time zone, language, currency, and date format.
- How to designate the Company CEO and review root-user activity logs.
- How to update branding,upload a logo and favicon, and customize the theme.
- How to add, activate, edit,and test SMTP settings.
- How to customize the AI Assistant.
📜 Note: Access to Organization Settings is controlled by role permissions. Changes made here apply to the entire organization, so they should be made only by users authorized to manage portal-level configuration.
Prerequisites
Before working with Organization Settings, ensure the following are in place:
- The user must be logged in with a role that has access to Portal Settings.
- Employees must already exist in the system before one can be designated as the Company CEO.
- Valid mail server details (host, port, encryption, username, and password) must be available before adding an SMTP setting.
- Logo and favicon image files must be prepared in a supported format and within the size limit before uploading.
Section 1: Accessing Organization Settings
After logging in to the HRMS Portal, follow the steps below to access Organization Settings.
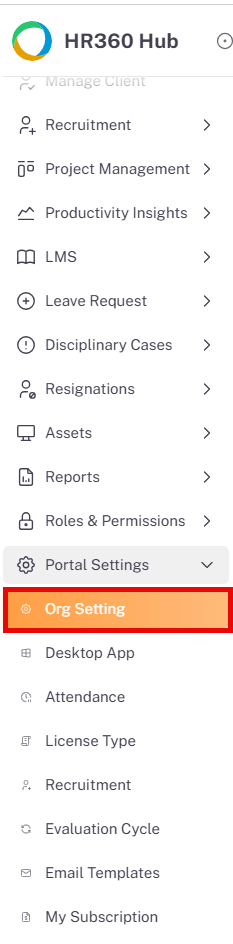
- From the left sidebar, click on Portal Settings to expand the sub-menu.
- The sub-menu displays Org Setting, Desktop App, Attendance, License Type, Recruitment, Evaluation Cycle, Email Templates, and My Subscription.
- Click on Org Setting to open Organization Settings.
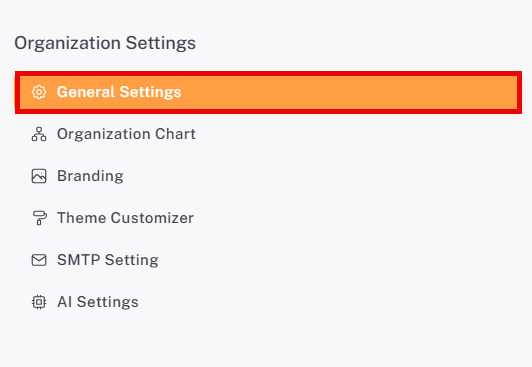
The Organization Settings page opens with a menu listing its six areas: General Settings, Organization Chart, Branding, Theme Customizer, SMTP Setting, and AI Settings. Click any item to open that area.
Section 2: General Settings
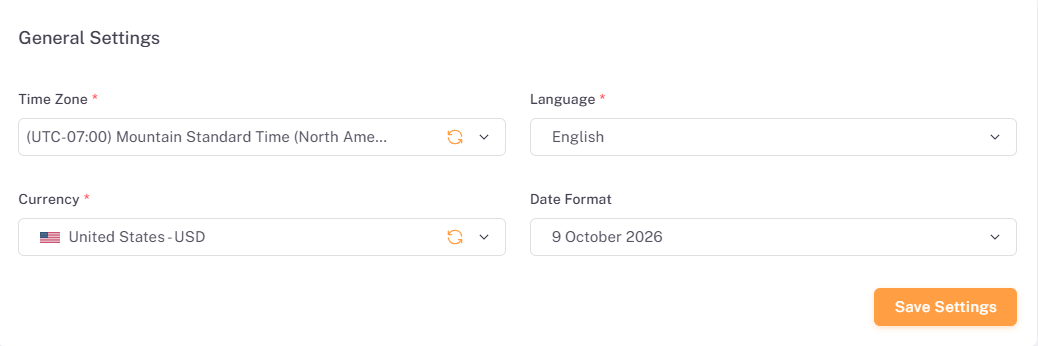
The General Settings page defines the organization-wide defaults for time zone, language, currency, and the way dates are displayed across the portal. To access it, open Organization Settings and click General Settings.
Field | Required | Description |
Time Zone | Yes | Select the time zone the organization operates in, e.g. (UTC-07:00) Mountain Standard Time (North America). |
Language | Yes | Select the display language for the portal, e.g. English. |
Currency | Yes | Select the organization's default currency, shown with its country flag, e.g. United States - USD. |
Date Format | No | Select how dates are displayed across the portal, e.g. 9 October 2026. |
After changing any value, click Save Settings to apply the changes. The Time Zone and Currency fields also include a refresh icon alongside the dropdown.
⚠️ Warning: Time zone, language, currency, and date format are organization-wide defaults. Changes take effect only after Save Settings is clicked.
Section 3: Organization Chart
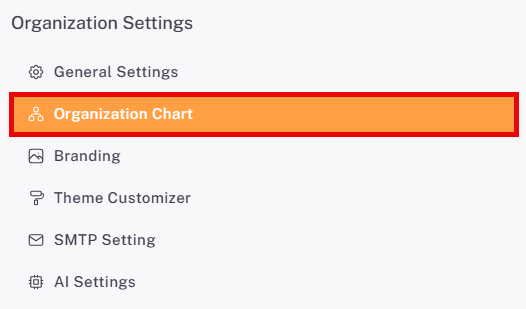
The Organization Chart settings define who sits at the very top of the reporting hierarchy. The user selected here is designated as the root user(typically the Company CEO). To access it, open Organization Settings and click Organization Chart.
3.1. Designating the Company CEO
The Organization Chart Settings page opens with an information banner explaining that the selected user becomes the top-level entity in the organizational chart, and that the Reporting To field is removed from that user's profile so their position at the highest level of the hierarchy is represented accurately.
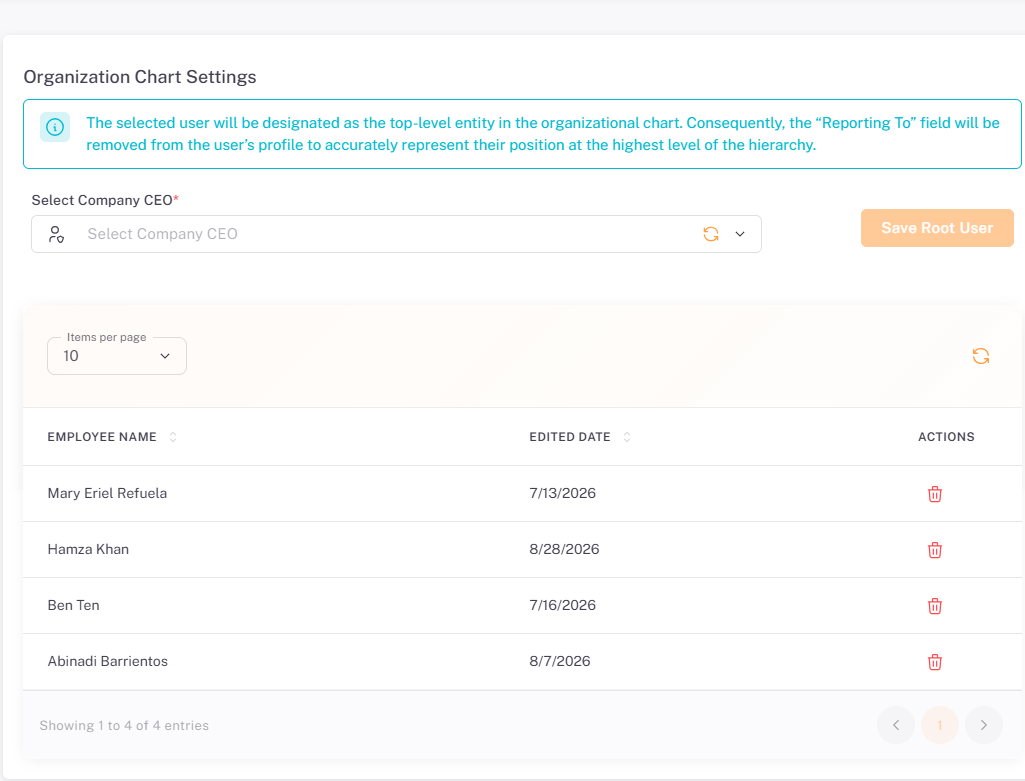
- Click the Select Company CEO dropdown and choose the employee to designate as the top-level user.
- Click Save Root User to apply the change. The button remains disabled until a user is selected.
⚠️ Warning: Designating a root user removes the Reporting To value from that employee's profile. Confirm the correct employee is selected before saving.
3.2. Root User Listing
Below the selection field, a table lists the employees who have been set as root users.
Column | Description | Sortable |
Employee Name | The full name of the employee designated as a root user. | Yes |
Edited Date | The date the employee's root-user record was last changed. | Yes |
Actions | Delete (trash) icon — removes the employee's root-user designation. | No |
Use the Items per page selector to control how many records appear per page, the refresh icon to reload the listing, and the pagination controls at the bottom to move between pages. The footer shows the number of entries displayed.
3.3. Activity Logs
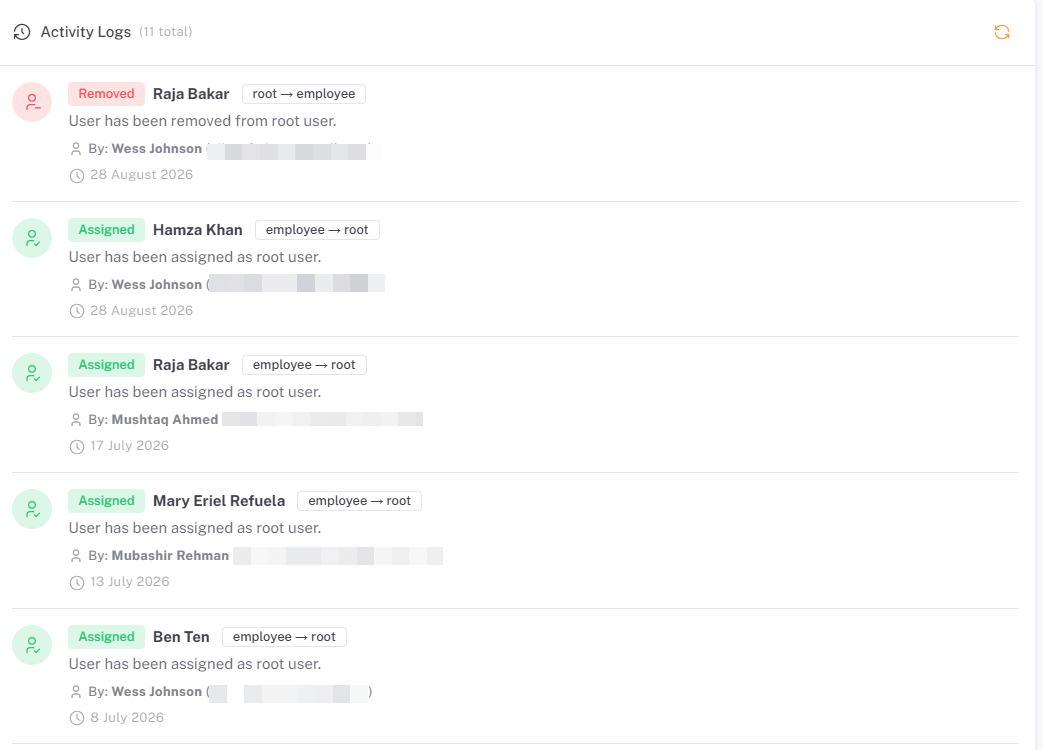
The Activity Logs panel keeps a history of every change made to root-user assignments, with the total number of log entries shown beside the heading. Click the refresh icon at the top right to reload the log.
Element | Description |
Action badge | Shows whether the user was Assigned or Removed as a root user. |
User name | The employee whose root-user status changed. |
Role change | The change in role, e.g. employee → root when assigned, or root → employee when removed. |
Description | A short message describing the change, e.g. User has been assigned as root user. |
By | The name and email address of the user who made the change. |
Date | The date the change was made. |
💡 Tip: Use the Activity Logs to confirm who changed the top of the hierarchy and when, for example when investigating an unexpected change in the organization chart.
Section 4: Branding
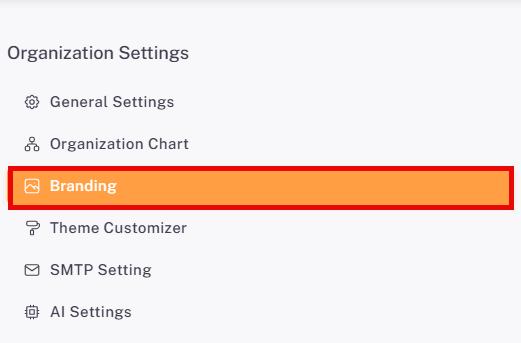
The Branding page controls how the organization's identity appears across the portal. To access it, open Organization Settings and click Branding.
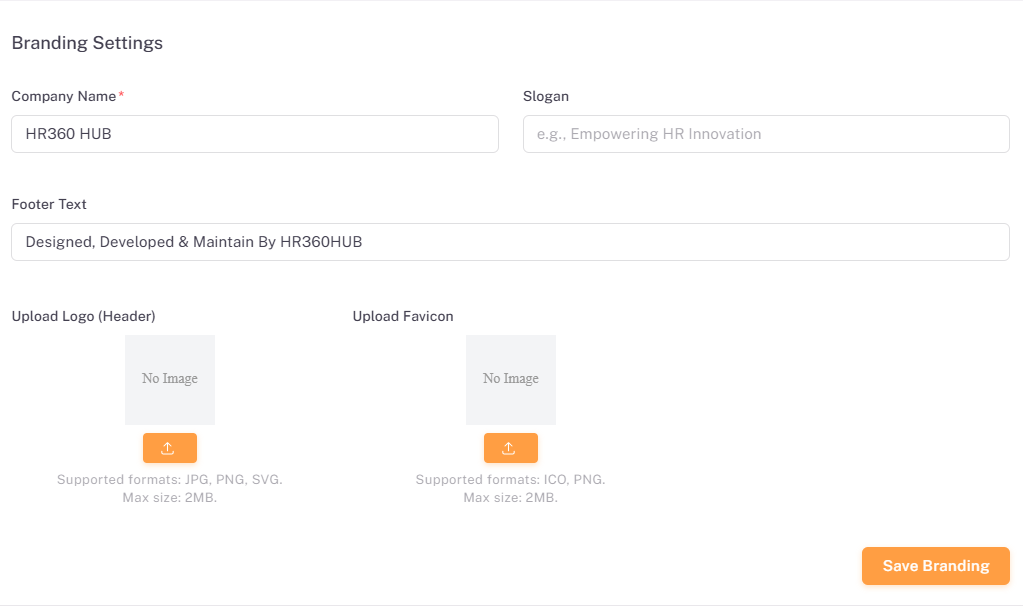
Field | Required | Description |
Company Name | Yes | Enter the organization's name, e.g. HR360 HUB. |
Slogan | No | Enter an optional tagline, e.g. Empowering HR Innovation. |
Footer Text | No | Enter the text displayed in the portal footer. |
Upload Logo (Header) | No | Upload the logo displayed in the portal header. Supported formats: JPG, PNG, SVG. Maximum size: 2MB. |
Upload Favicon | No | Upload the small icon displayed in the browser tab. Supported formats: ICO, PNG. Maximum size: 2MB. |
To upload an image, click the upload button beneath the relevant preview box and select the file. The preview shows No Image until a file has been uploaded. Click Save Branding to apply the changes.
📜 Note: Files that exceed 2MB or use an unsupported format cannot be uploaded. Prepare the logo and favicon in advance to avoid interruptions.
Section 5: Theme Customizer
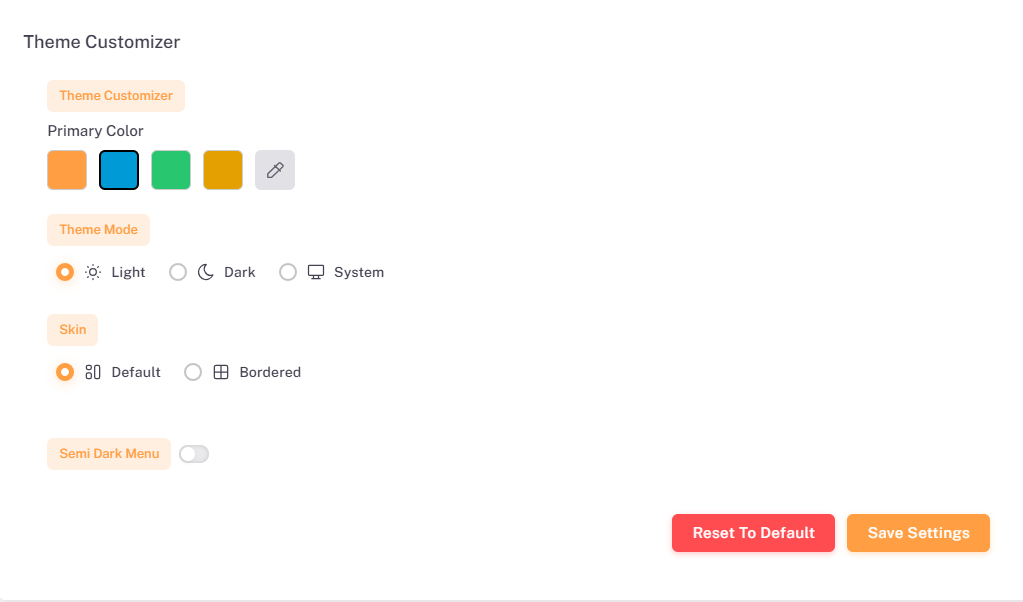
The Theme Customizer controls the visual appearance of the portal. To access it, open Organization Settings and click Theme Customizer.
Option | Description |
Primary Color | Select the portal's accent colour from the preset swatches (orange, blue, green, amber), or use the colour-picker icon to choose a custom colour. |
Theme Mode | Choose Light, Dark, or System. System follows the device's own light or dark setting. |
Skin | Choose Default or Bordered to change how panels and cards are outlined. |
Semi Dark Menu | Toggle on to display the left sidebar menu in a darker shade. |
Click Save Settings to apply the selections. ClickReset To Default to restore the original theme.
📜 Note: Theme settings apply to all organization users, but individuals can personalize their profiles by changing theme color and other options through the Theme Customizer in the dropdown under the top‑right avatar.
💡 Tip: Use Reset To Default if a colour or mode combination makes the portal difficult to read, then save to return to the standard appearance.
Section 6: SMTP Setting
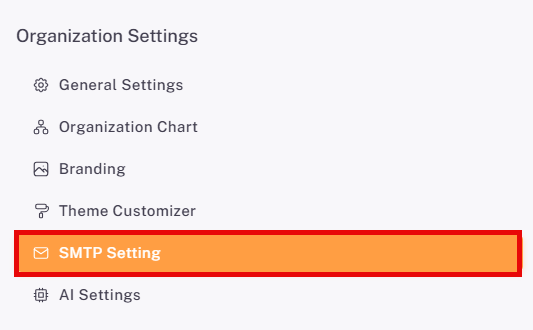
The SMTP Setting page manages the outgoing mail servers the portal uses to send emails such as notifications and system messages. To access it, open Organization Settings and click SMTP Setting.
6.1. SMTP Listing
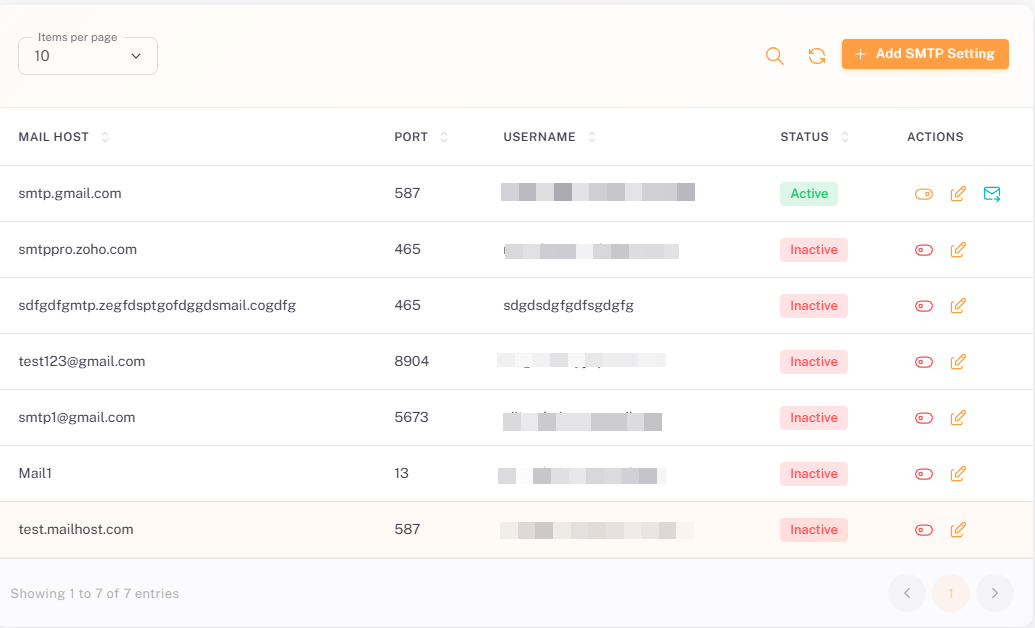
The listing displays every SMTP configuration added to the system.
Column | Description | Sortable |
Mail Host | The address of the mail server, e.g. smtp.gmail.com. | Yes |
Port | The port number used to connect to the mail server. | Yes |
Username | The account used to authenticate with the mail server. | Yes |
Status | Whether the configuration is Active (green) or Inactive (red). | Yes |
Actions | Toggle icon — activates or deactivates the configuration. Pencil icon — edits the configuration. Envelope icon — sends a test email (shown on the active configuration). | No |
Page controls on the listing:
- Items per page: Controls the number of records displayed per page (default: 10).
- Search icon: Filter the SMTP configurations.
- Refresh icon: Reload the listing to reflect the latest changes.
- + Add SMTP Setting: Opens the Add SMTP Settings dialog.
- Pagination controls: Navigate through pages at the bottom of the listing.
6.2. Adding an SMTP Setting
Click + Add SMTP Setting to open the Add SMTP Settings dialog.
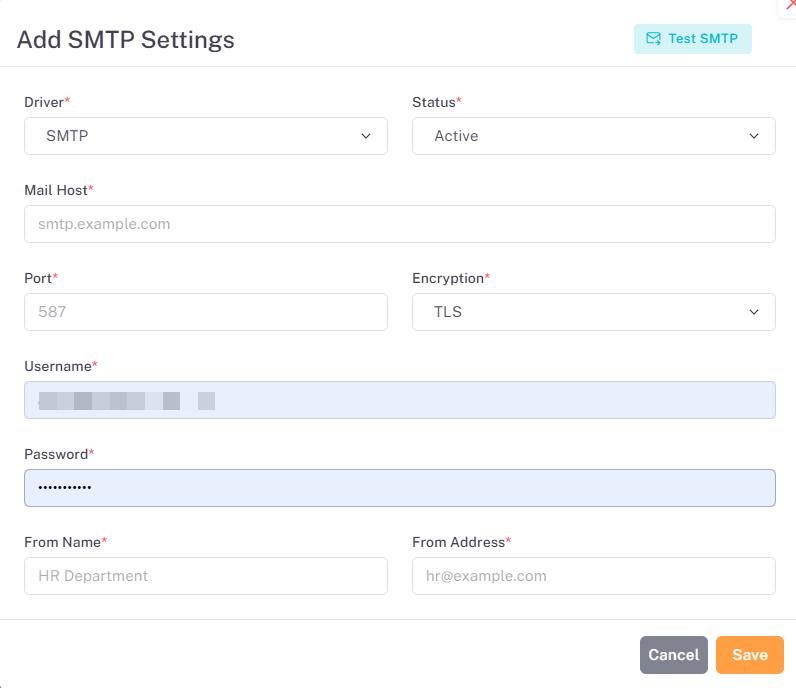
Field | Required | Description |
Driver | Yes | Select the mail driver, e.g. SMTP. |
Status | Yes | Select Active to use this configuration, or Inactive to save it without using it. |
Mail Host | Yes | Enter the mail server address, e.g. smtp.example.com. |
Port | Yes | Enter the port number of the mail server, e.g. 587. |
Encryption | Yes | Select the encryption method, e.g. TLS. |
Username | Yes | Enter the username used to log in to the mail server. |
Password | Yes | Enter the password for the mail account. The characters are masked. |
From Name | Yes | Enter the sender name shown on outgoing emails, e.g. HR Department. |
From Address | Yes | Enter the sender email address shown on outgoing emails, e.g. [email protected]. |
Click Test SMTP at the top of the dialog to verify the connection details before saving. Click Save to add the configuration, or Cancel to close the dialog without saving.
💡 Tip: Use Test SMTP before saving to confirm the host, port, encryption, and credentials work, so outgoing emails are not interrupted.
⚠️ Important: Only the configuration with Active status is used to send emails. Activating a configuration should be done only after its details have been tested.
Section 7: AI Settings
The AI Settings page lets administrators customize the portal's AI Assistant to match company branding. To access it, open Organization Settings and click AI Settings.
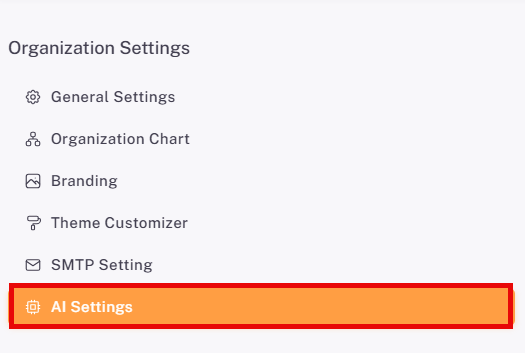
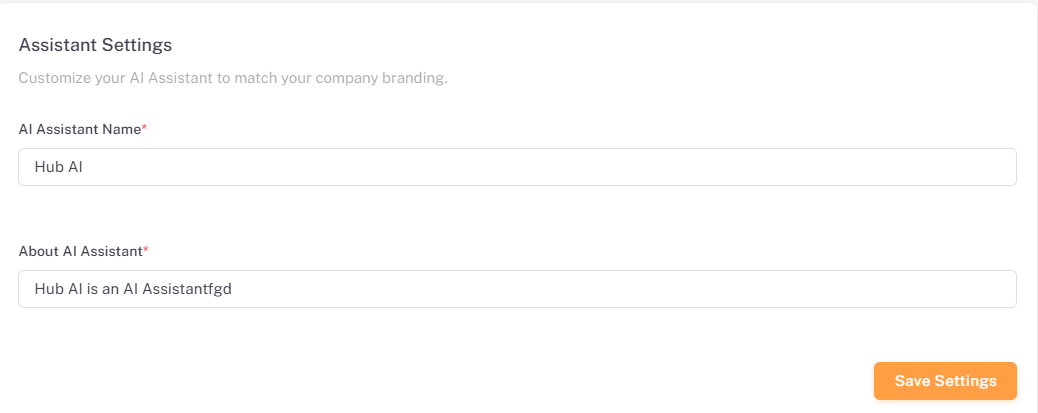
Field | Required | Description |
AI Assistant Name | Yes | Enter the name displayed for the AI Assistant, e.g. Hub AI. |
About AI Assistant | Yes | Enter a short description of the AI Assistant. |
Click Save Settings to apply the changes.
📜 Note: The AI Assistant name and description are visible to users of the portal, so enter text that is clear and appropriate for the organization.
Summary
The following table provides a complete step-by-step summary of all key workflows in Organization Settings:
# | Action / Step | Result |
1 | Access Organization Settings: Log in → Portal Settings in left sidebar → Org Setting. | Organization Settings opens with General Settings, Organization Chart, Branding, Theme Customizer, SMTP Setting, and AI Settings. |
2 | Update General Settings: General Settings → Select Time Zone, Language, Currency, and Date Format → Click Save Settings. | Organization-wide time zone, language, currency, and date format are updated. |
3 | Designate the Company CEO: Organization Chart → Select Company CEO → Click Save Root User. | The selected user becomes the top-level user of the hierarchy and their Reporting To field is removed. |
4 | Review or remove a root user: Organization Chart → Review the root user listing and Activity Logs → Click the Delete icon to remove a designation. | Root-user records and the history of assignments and removals are displayed; removed users revert to employee. |
5 | Update Branding: Branding → Enter Company Name, Slogan, and Footer Text → Upload Logo and Favicon → Click Save Branding. | Company identity, logo, and favicon are updated across the portal. |
6 | Customize the Theme: Theme Customizer → Select Primary Color, Theme Mode, Skin, and Semi Dark Menu → Click Save Settings. | The portal appearance is updated. Click Reset To Default to restore the original theme. |
7 | Add an SMTP Setting: SMTP Setting → Click + Add SMTP Setting → Enter driver, host, port, encryption, credentials, and sender details → Click Test SMTP → Click Save. | A new mail server configuration is added to the SMTP listing. |
8 | Manage an SMTP Setting: On the SMTP listing, use the toggle to activate or deactivate, the pencil icon to edit, or the envelope icon to send a test email. | The configuration status is updated, edited, or tested. Only the Active configuration sends emails. |
9 | Customize the AI Assistant: AI Settings → Enter AI Assistant Name and About AI Assistant → Click Save Settings. | The AI Assistant is displayed with the customized name and description. |