

Overview
Recruitment Settings, found under Portal Settings, is where Super Admins configure the reference data and shared resources used across the Recruitment module: the public career portal, the skills catalogue, hiring pipeline stage statuses, the pool of available recruiters, and the contact mediums used when logging applicant activities.
This is a separate area from the day-to-day Recruitment module (Dashboard, All Openings, Applicants) documented in the Recruitment Module User Guide. Recruitment Settings controls the configuration those screens draw on, rather than the job openings and applicants themselves.
This guide covers:
- How to access Recruitment Settings from the left sidebar.
- How the Career Portal link works, and how it differs from an individual job's Share Job Link.
- How to manage the Skills catalogue used in job requisitions.
- How to manage Stages Status, the sub-statuses available within each hiring pipeline stage.
- How to manage the pool of departments available as Manage Recruiters.
- How to manage Contact Medium options used when logging applicant activities.
📜 Note: Only Super Admins, or users with the relevant Recruitment settings permissions, can view or edit Recruitment Settings. See the Roles & Permissions — Recruitment Module guide for the specific permission groups (Career Portal Settings, Skills Settings, Stage Status Settings, Recruiter Settings, and Contact Medium Settings).
Prerequisites
Before working with Recruitment Settings, ensure the following are in place:
- The user must be logged in as a Super Admin or have the relevant Recruitment settings permissions.
- At least one department must be configured in the system before adding a recruiter under Manage Recruiters.
Section 1: Accessing Recruitment Settings
After logging in to the HRMS Portal as a Super Admin, follow the steps below to access Recruitment Settings.
- From the left sidebar, scroll down and click on Portal Settings to expand its sub-menu.
- Click on Recruitment under Portal Settings.
- The Recruitment Settings page opens, showing five tabs down the left side: Career Portal, Skills, Stages Status, Manage Recruiters, and Contact Medium.
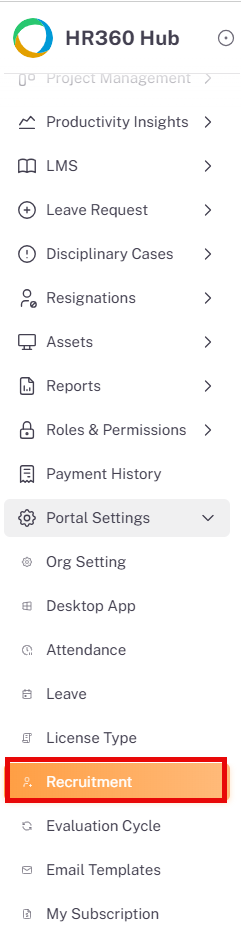
⚠️ Important: Portal Settings > Recruitment is distinct from the main Recruitment item earlier in the sidebar. The main Recruitment item opens the operational module (Dashboard, All Openings, Applicants); Portal Settings > Recruitment opens this configuration area.
Section 2: Career Portal
The Career Portal tab provides the single public URL through which candidates can browse every open job opening posted by the organization.
2.1. Career Portal URL
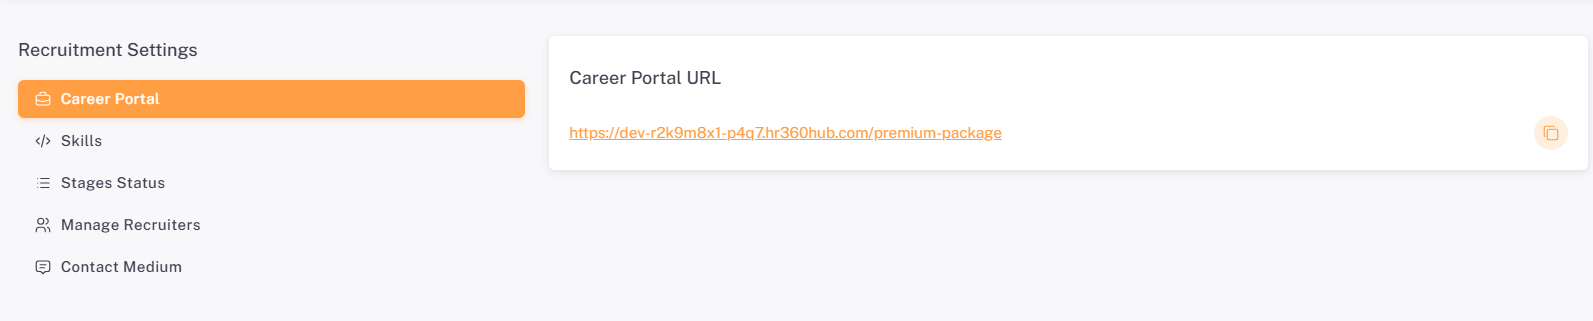
- Click the copy icon next to the URL to copy the Career Portal link to the clipboard.
- Share this link anywhere candidates should be able to browse all current openings, e.g. the organization's website or social media.
2.2. The Public Career Portal
Opening the Career Portal URL takes candidates to a public jobs page listing every open job opening across the organization, with filters for Department, Job Type, and Location, and job openings grouped by department.
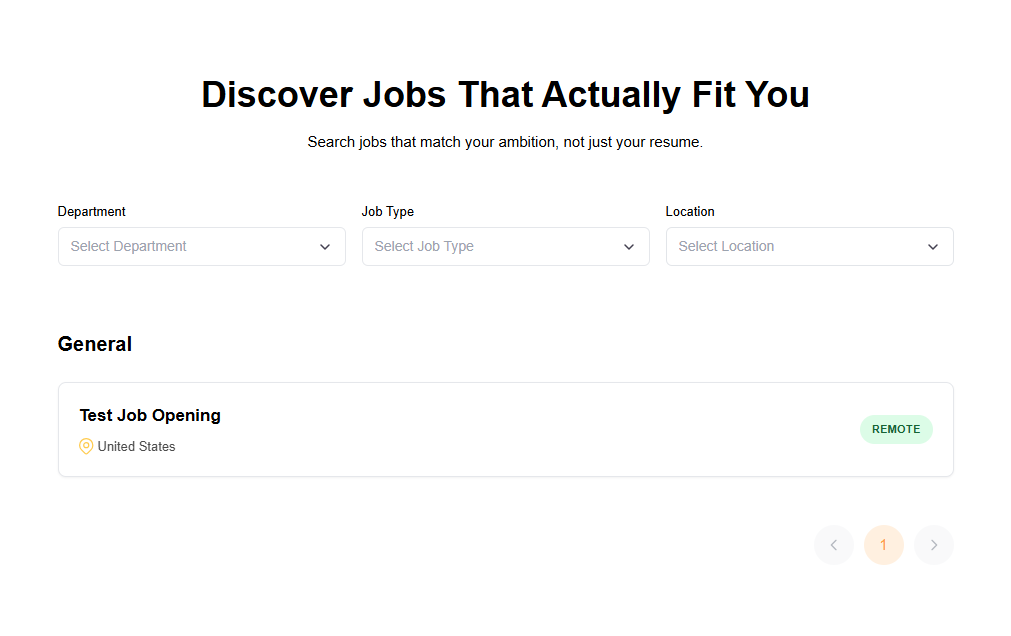
📜 Note: The Career Portal URL always reflects the full, current set of open job openings — once a job requisition is created and its Job Status is set to Open and , it appears on this page automatically, and is removed automatically if its status changes or the target date approaches.
⚠️ Warning: The Career Portal URL is not the same as an individual job's Share Job Link. The Career Portal URL shows every open job opening organization-wide. Each job opening also has its own Share Job Link, found on that job's Sharing tab in the Recruitment module (see Job Opening Details — Sharing Tab in the Recruitment Module User Guide), which opens the application form for that specific job only.
Section 3: Skills
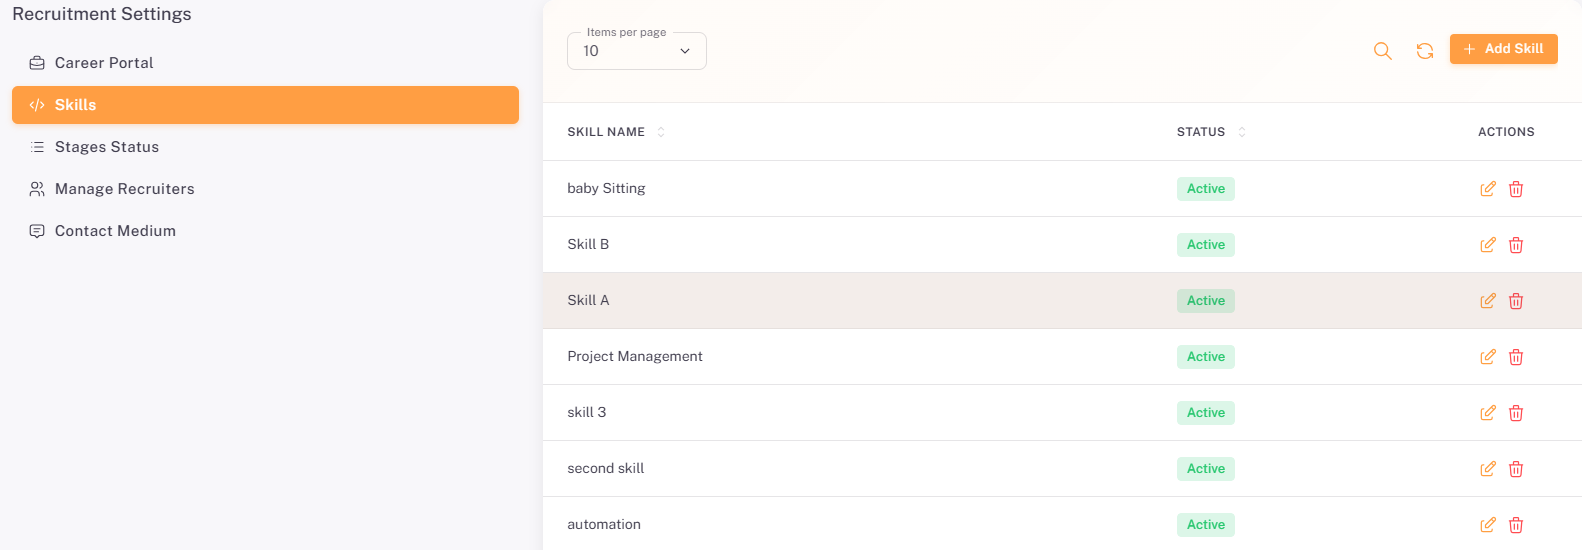
The Skills tab manages the catalogue of skill tags available for selection in the Skills & Requirements step of the Create Job Requisition wizard.
3.1. Skills Listing
Column | Description | Sortable |
Skill Name | The name of the skill or skill grouping, e.g. Data Entry, Stakeholder Management. | Yes |
Status | Whether the skill is Active and available for selection when creating a job requisition. | Yes |
Actions | Pencil icon — edit the skill. Trash icon — delete the skill. | No |
- Search icon: Filter skills by name.
- Refresh icon: Reload the listing to reflect the latest changes.
- + Add Skill button: Opens the Add New Skill dialog.
3.2. Adding a New Skill
On the Skills tab, click + Add Skill. The Add New Skill dialog opens.
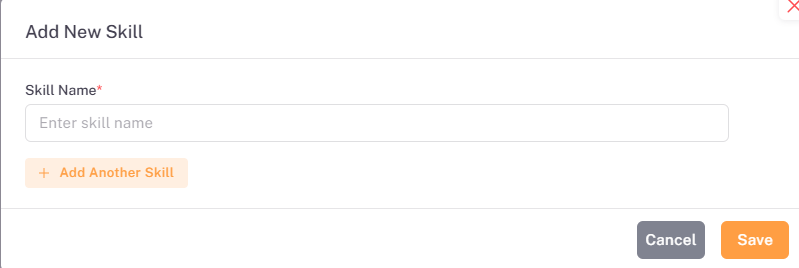
Field | Required | Description |
Skill Name | Yes | Enter the name of the new skill. |
- Click + Add Another Skill to add multiple skills in a single save, without closing the dialog.
- Click Save to add the new skill(s). They immediately appear in the Skills listing and become available in the Create Job Requisition wizard.
- Click Cancel to discard the entry and close the dialog without saving.
3.3. Editing a Skill
Click the pencil icon on any skill row to open the Edit skill dialog, pre-filled with that skill's current values.
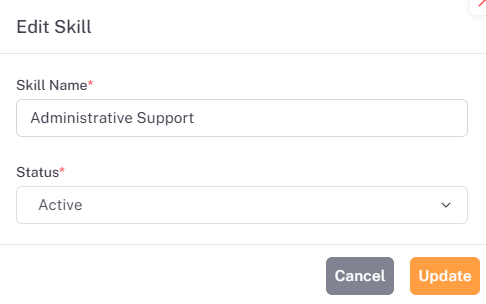
Field | Required | Description |
Skill Name | Yes | Update the name of the skill |
Status | Yes | Set to active or inactive |
Click Update to save the changes or Cancel to close the dialog without saving.
3.4. Deleting a Skill
- Click the trash icon on any kill row to open the Delete skill confirmation dialog.
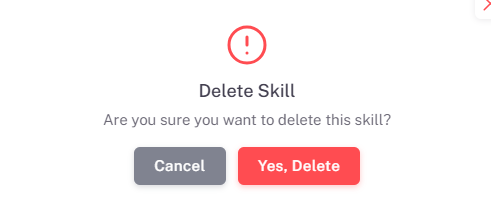
- Click Yes, Delete to permanently remove the skill, or Cancel to keep it.
Section 4: Stages Status
The Stages Status tab manages the specific sub-statuses available within each hiring pipeline stage, e.g. Offer Made and Offer Accepted within the Offered stage.
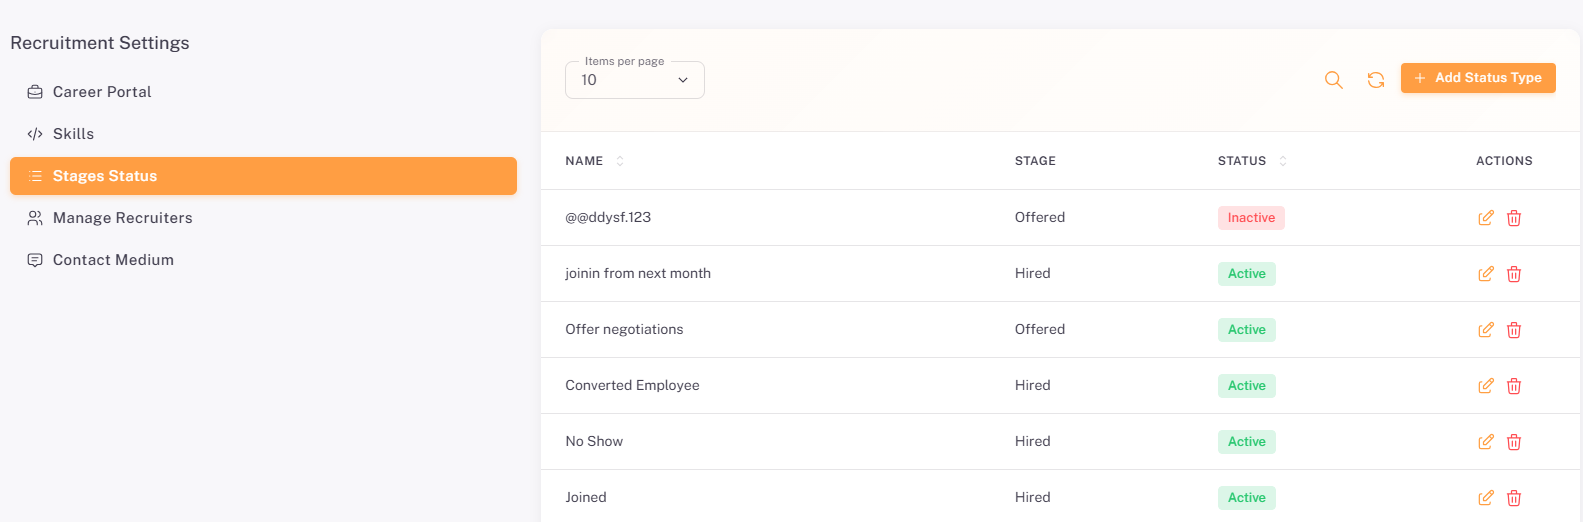
4.1. Stages Status Listing
Column | Description | Sortable |
Name | The name of the sub-status, e.g. Hired, Offer Withdraw, Rejected for Interview. | Yes |
Stage | The parent hiring pipeline stage this status belongs to, e.g. Hired, Offered, Interview. | No |
Status | Whether this sub-status is Active and available for selection. | No |
Actions | Pencil icon — edit the sub-status. Trash icon — delete the sub-status. | No |
- Search icon: Filter sub-statuses by name.
- Refresh icon: Reload the listing to reflect the latest changes.
- + Add Status Type button: Opens the Add New Stage Status dialog.
4.2. Adding a New Stage Status
On the Stages Status tab, click + Add Status Type. The Add New Stage Status dialog opens.
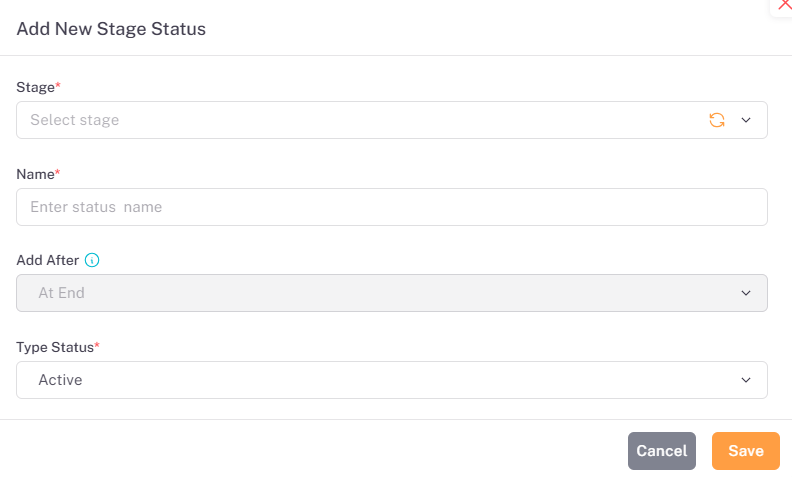
Field | Required | Description |
Stage | Yes | Select the parent hiring pipeline stage this sub-status belongs to, e.g. Interview, Offered, Hired. |
Name | Yes | Enter the name of the new sub-status. |
Add After | No | Select where the new sub-status should appear in the order within its stage. Defaults to At End. |
Type Status | Yes | Select whether the sub-status is Active and available for selection. Defaults to Active. |
- Click Save to add the new sub-status. It immediately appears in the Stages Status listing under its selected Stage.
- Click Cancel to discard the entry and close the dialog without saving.
4.3. Editing a Stage Status
Click the pencil icon on any sub-status row to open the Edit Stage Status dialog, pre-filled with that sub status's current values.
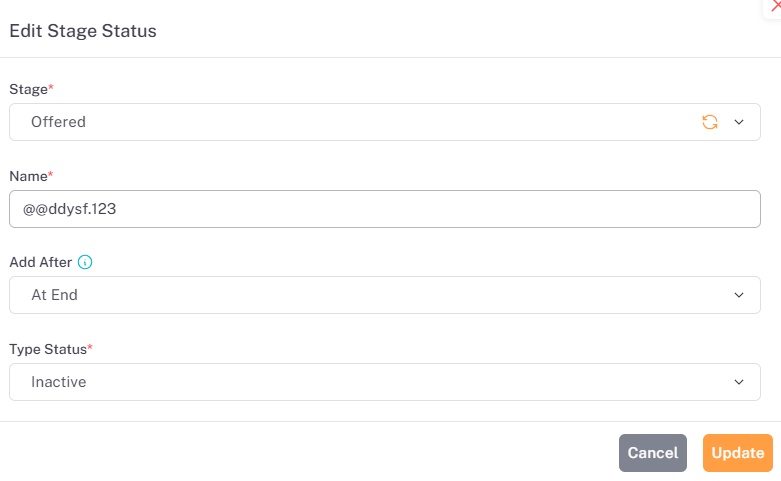
Field | Required | Description |
Stage | Yes | Change the parent hiring pipeline stage this sub-status belongs to |
Name | Yes | Update the name of the sub-status |
Add After | No | Change where the sub-status appears in the order within its stage |
Type status | Yes | Set to Active or Inactive |
4.4. Deleting a Stage Status
- Click the trash icon on any sub-status to open the Delete stages Status confirmation dialog.
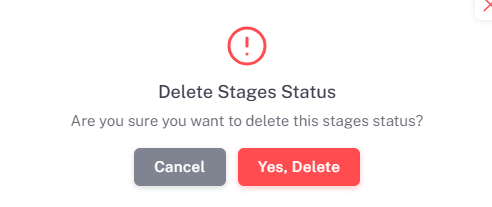
- Click Yes, Delete to permanently remove the sub status, or Cancel to keep it.
Section 5: Manage Recruiters
The Manage Recruiters tab manages which departments are available for assignment as recruiters when creating a job requisition.

5.1. Manage Recruiters Listing
Column | Description |
Recruiter Department | The name of the department made available for recruiter assignment, e.g. Information Technology. |
Actions | Trash icon — remove the department from the recruiter pool. There is no edit action. |
- Search icon: Filter by department name.
- Refresh icon: Reload the listing to reflect the latest changes.
- + Add Recruiter button: Opens the Add New Recruiter dialog.
5.2. Adding a New Recruiter
On the Manage Recruiters tab, click + Add Recruiter. The Add New Recruiter dialog opens.
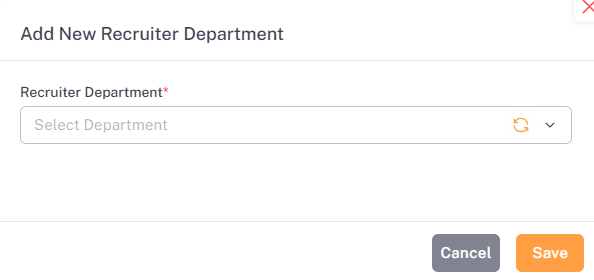
Field | Required | Description |
Recruiter Department | Yes | Select the department to add to the recruiter pool. |
- Click Save to add the department. It immediately appears in the Manage Recruiters listing.
- Click Cancel to discard the entry and close the dialog without saving.
📜 Note: Manage Recruiters controls which departments are available for assignment as recruiters on a job requisition. Individual recruiter users are assigned from this pool in the Recruiters field of the Create Job Requisition wizard.
5.3. Deleting a Recruiter
Click the trash icon on any recruiter to open the Delete Recruiter confirmation dialog.
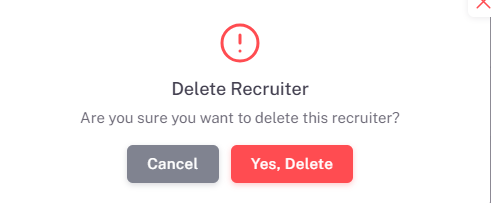
Click Yes, Delete to permanently remove the Recruiter, or Cancel to keep it
Section 6: Contact Medium
The Contact Medium tab manages the list of contact mediums available for selection when logging an applicant activity, e.g. Email, Phone Call, LinkedIn.
6.1. Contact Medium Listing
Column | Description | Sortable |
Name | The name of the contact medium, e.g. Email, Phone Call, WhatsApp, LinkedIn, SMS / Text Message, Referral, Other. | Yes |
Status | Whether the contact medium is Active and available for selection. | Yes |
Actions | Pencil icon — edit the contact medium. Trash icon — delete the contact medium. | No |
- Search icon: Filter contact mediums by name.
- Refresh icon: Reload the listing to reflect the latest changes.
- + Add Contact Medium button: Opens the Add New Contact Medium dialog.
6.2. Adding a New Contact Medium
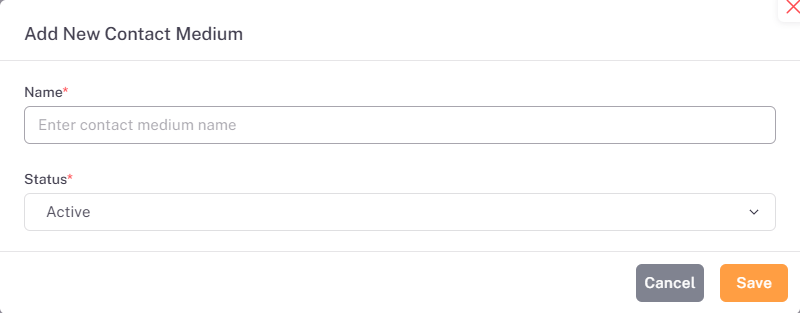
On the Contact Medium tab, click + Add Contact Medium. The Add New Contact Medium dialog opens.
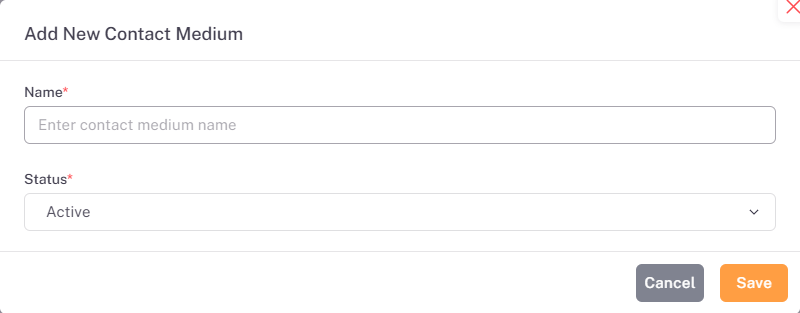
Field | Required | Description |
Name | Yes | Enter the name of the new contact medium. |
Status | Yes | Select whether the contact medium is Active and available for selection. Defaults to Active. |
- Click Save to add the new contact medium. It immediately appears in the Contact Medium listing and becomes available when logging an applicant activity.
- Click Cancel to discard the entry and close the dialog without saving.
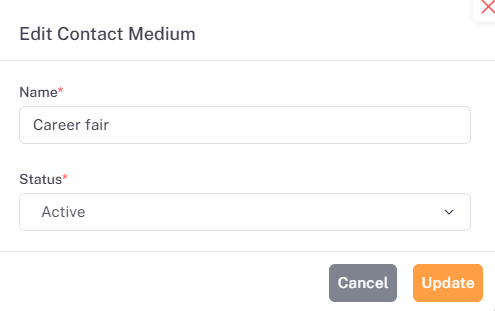
4.3. Editing a Contact Medium
Click the pencil icon on any contact medium row to open the Edit Contact Medium dialog, pre-filled with that contact medium's current values.
4.4. Deleting a Contact Medium
- Click the trash icon on any contact medium to open the Delete confirmation dialog.
- Click Yes, Delete to permanently remove the sub status, or Cancel to keep it.
Summary
The following table provides a complete step-by-step summary of the Recruitment Settings area:
# | Action / Step | Result |
1 | Access Recruitment Settings: Log in as Super Admin → Portal Settings in left sidebar → Recruitment. | Recruitment Settings page opens showing the Career Portal, Skills, Stages Status, Manage Recruiters, and Contact Medium tabs. |
2 | Career Portal: Open the Career Portal tab → Copy the Career Portal URL. | Public link copied, showing every open job opening organisation-wide when opened — distinct from an individual job's Share Job Link. |
3 | Skills: Open the Skills tab → Click + Add Skill → Enter Skill Name(s) → Click Save. | New skill(s) added and available in the Skills & Requirements step of the Create Job Requisition wizard. |
4 | Stages Status: Open the Stages Status tab → Click + Add Status Type → Select Stage, enter Name, set Add After and Type Status → Click Save. | New sub-status added under its selected pipeline stage. |
5 | Manage Recruiters: Open the Manage Recruiters tab → Click + Add Recruiter → Select Recruiter Department → Click Save. | Department added to the recruiter pool, available in the Recruiters field of the Create Job Requisition wizard. |
6 | Contact Medium: Open the Contact Medium tab → Click + Add Contact Medium → Enter Name, set Status → Click Save. | New contact medium added and available when logging an applicant activity. |